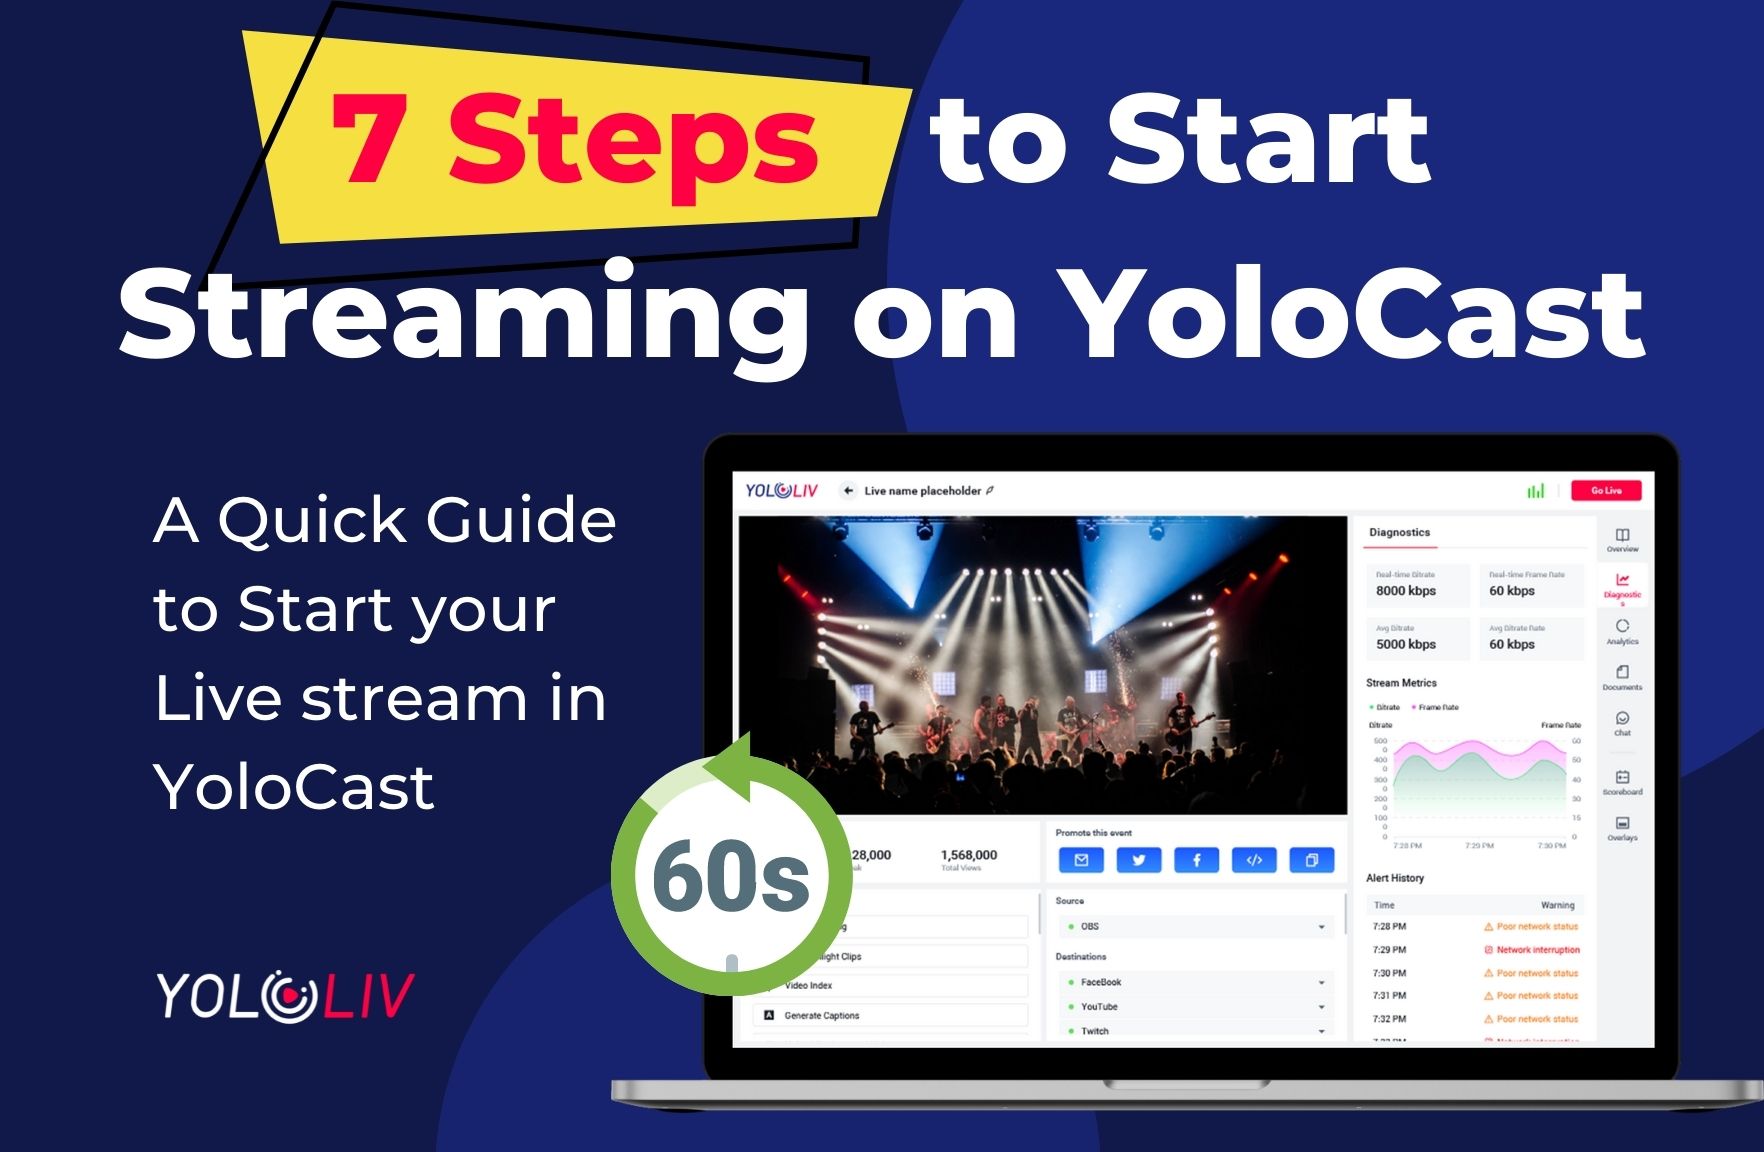
Introducing YoloCast
YoloCast is a complete, easy-to-use live streaming platform, where you can STREAM, HOST, SCHEDULE & MONETIZE all in one place. With YoloCast, you can broadcast live video from your mobile app, hardware encoder (Like YoloBox), or software encoder (OBS) of your choice. Extend your reach and easily broadcast live events to anyone, anywhere.
7 Steps to Start Streaming on YoloCast
If you are new to YoloCast and have no idea how to get started, here are 7 steps that you can follow to start streaming in under 1 minute.
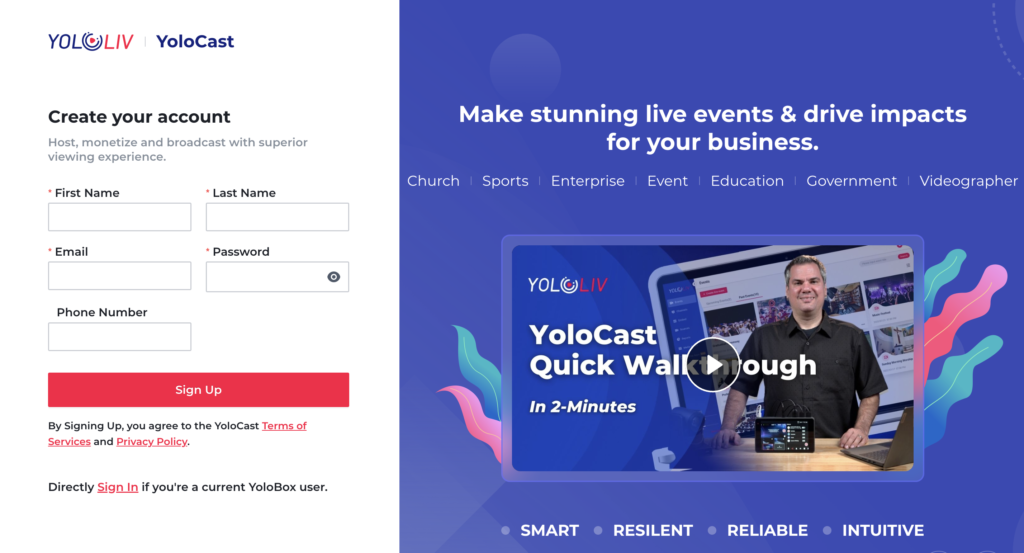
Step 1: Sign up/Log In
YoloBox users can use the Yololiv account to log in directly, while new users need to create an account. Once you log into YoloCast for the first time, you would automatically get a 14-day free trial of the business plan which you can try out all the functions in YoloCast.
Step 2: Add Video Sources
To start streaming, the first thing you need to do is to go to the “Stream Source” section. You can add a video source from:
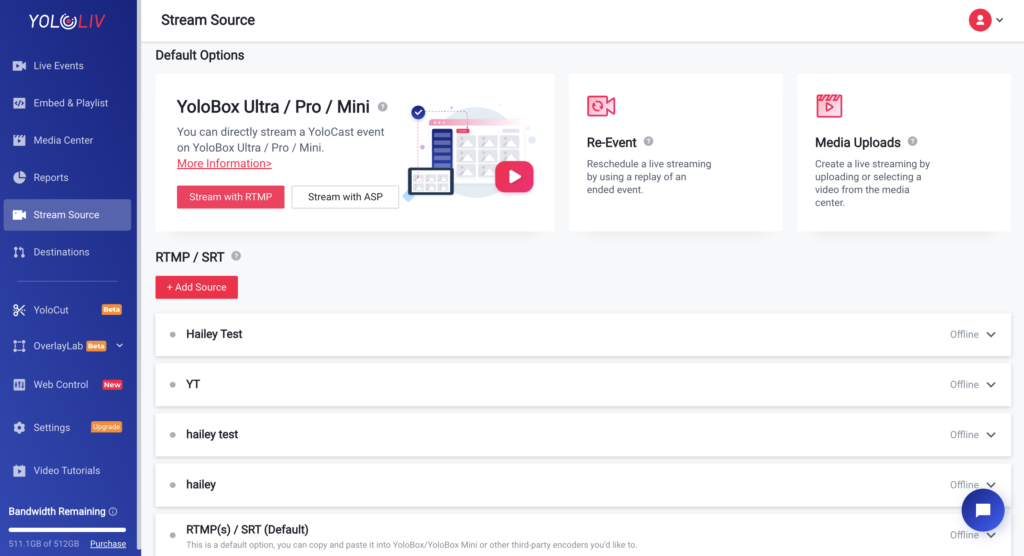
- YoloBox lineups (Yolo Box Ultra, YoloBox Pro & YoloBox Mini)
- Re-Event (Replay or ended Events)
- Media Uploads (Uploaded or selected video from media center)
- RTMP/SRT Source (Hardware encoders, software encoders, Live Streaming Apps)
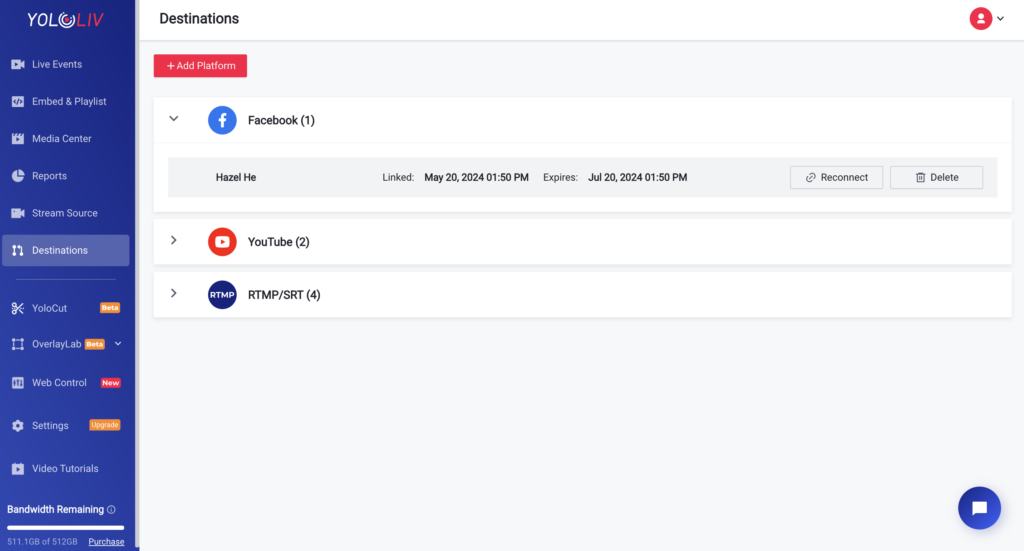
Step 3: Add Destinations
Besides the Sources, you also need to add your streaming platforms in Destinations. YoloCast supports multi-stream up to 30 destinations at the same time, including Facebook(Timeline, Page, and Groups would be regarded as different destinations available at the same time), YouTube, Twitch, and other RTMP destinations. You can click the “Add Destination” button to connect your social media accounts.
Step 4: Create an Event
With the video sources and destinations set up, you can now create your first live event. Starting from the overview, you can add this information for the live stream.
- Title&Description
- Content-Type
- Thumbnail
- Trailer(available on YoloCast exclusive&business plan)
- Privacy
- Destinations
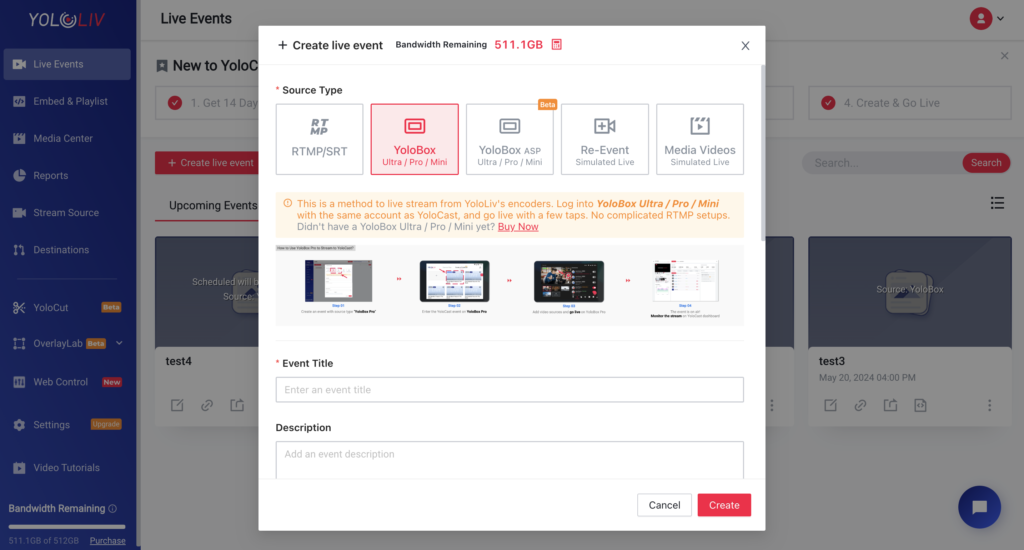
You can also choose video sources when you create live events.
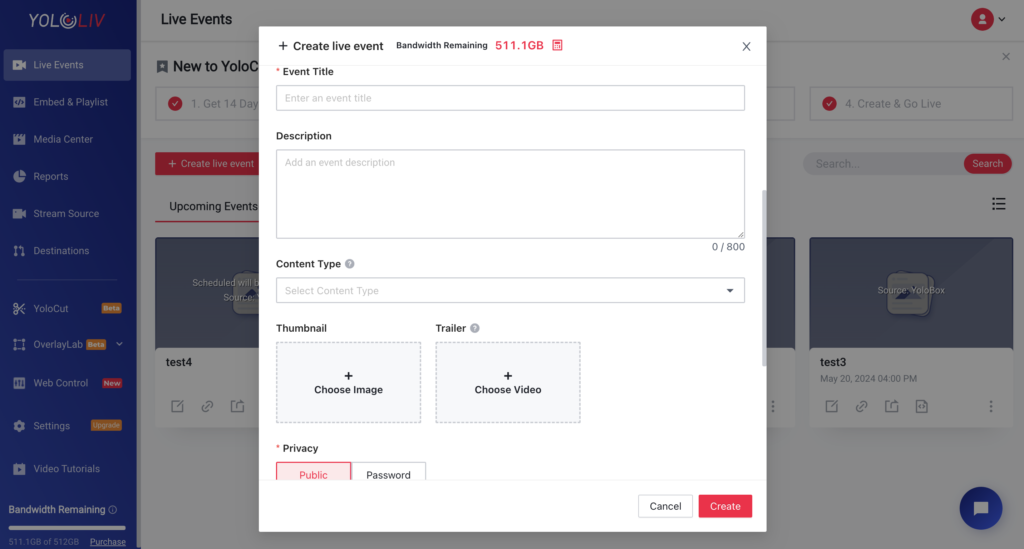
Step 5: Schedule the Event
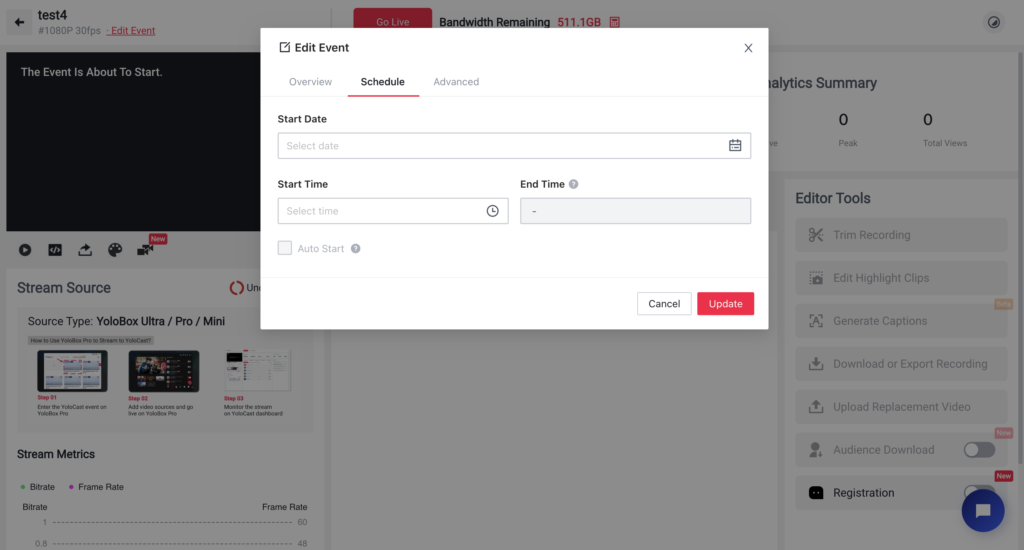
The second part is the Schedule. You can choose whenever you want to start and end in date and time. You can also make a live stream a recurring event (daily, weekly, or monthly). After scheduling, click ”Create”, and then you will get a new live event.
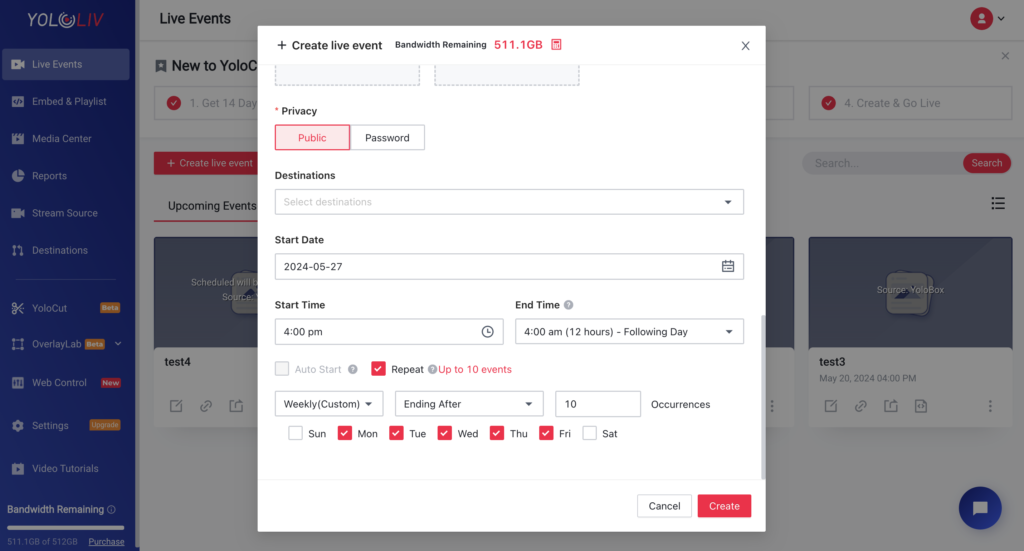
Step 6: Edit Live Event
After creating your live event, enter the live event. In the top left corner, you will find ‘Edit Event’. In the overview section, you can edit:
- Video resolution
- Frame rate
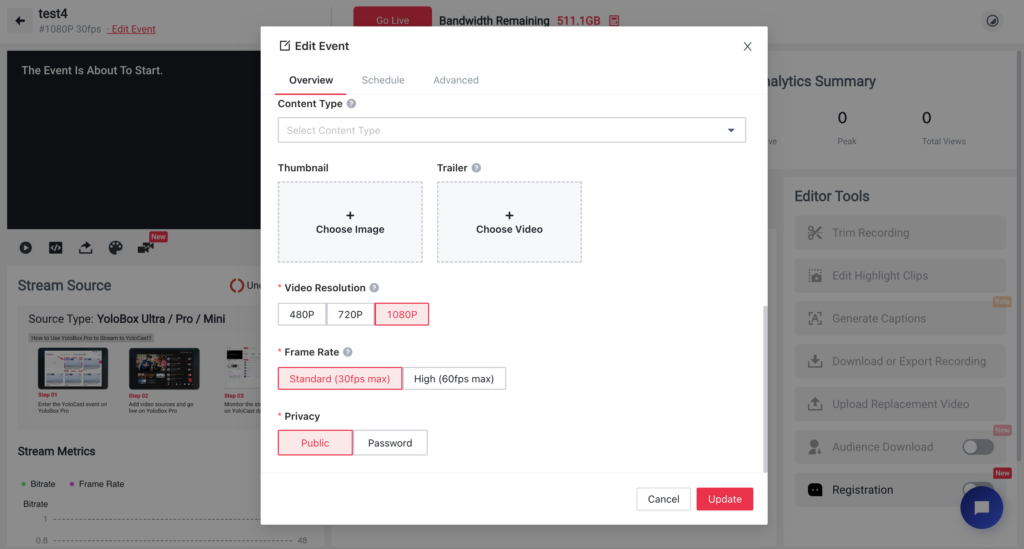
In the schedule section, you can adjust the scheduled time.
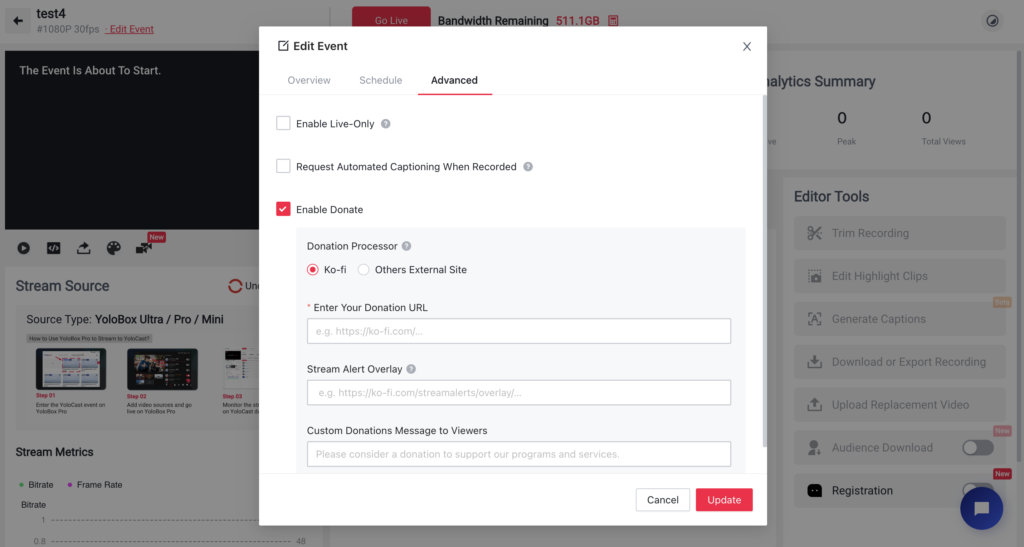
In the advanced section, you can edit:
- Enable Live-Only
- Request Automated Captioning When Recorded
- Enable Donate
Step 7: Embed on Website (optional)
If you prefer not to stream to public social media platforms but to your own website, here comes in video embedding feature. You can embed the recorded live events, highlight clips, or local videos on your website. To know more about the embedding steps and benefits, check this blog with detailed steps and more information.
What Else You Can Do on YoloCast
There’re many features that you can do with YoloCast, including:
- Rebroadcast an ended live stream to your viewers and present it to them as if it were happening live with Simulated Live.
- Highlight Clipping. Capture important moments and share them on social media by quickly clipping highlights mid- or post-broadcast.
- Automated Captioning. Save time and make your recorded broadcast more accessible by automatically captioning it after your live event is over.
- Replace a recorded live broadcast with a post-produced copy of the same event to present the best video for the target audience.
- With the Document Display feature, you can provide those watching with a PDF document about your service, your clients and more, right next to your video player.
- YoloCast provides detailed & real-time analytics for your viewers and viewership, including views, viewer-location, view times, device type, engagement and more.
- Monetize your broadcasts by enabling the donation option. Easily earn revenue for your personal brands.
- Add a pre-roll video to your live stream to keep your audiences engaged before the show begins.
- Want to add Sponsors and Ads to Your Live Stream? There’re 3 ways to do that.
- YoloCast supports both RTMP and SRT streaming. But what are the differences? Check SRT vs RTMP: Which to Choose for Your Live Stream?
Let’s Wrap Up
Learning how to live stream in a short time period gives you the freedom to go live whenever you want. So, go on, create broadcasts, add your brand elements and insert video in between to unlock your live stream’s true potential.
YoloCast’s browser-based live streaming studio ensures the high quality and stability of your live streaming career. For regular tips and exclusive offers, please join our community on the Facebook group.
Interested in learning more about our new streaming solution YoloCast? Sign up to get a 14-day free trial: https://www.yololiv.com/yolocast-overview
Cerise is a support specialist at YoloLiv with three years of experience working as a Customer Support Specialist in the consumer electronics industry. She also produces articles including video productions, tips and tricks and expert knowledge in the audiovisual industry.

