Integrating your GoPro with YoloBox can elevate your live streaming experience. Do you want to leverage the high-quality video capabilities of the GoPro? Here’s a guide on how to connect your GoPro to YoloBox, including both wired and wireless options.
Wired Connection
Since the GoPro Hero 8 has different built-in interface configurations compared to the models before and after it, we will introduce how to connect these two types of GoPro separately.
1) GoPro Hero 7
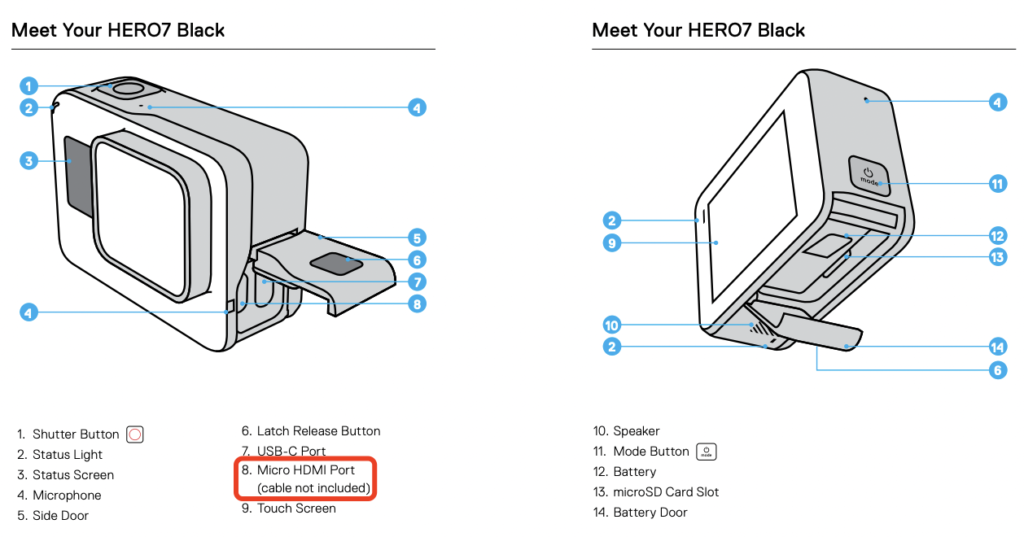
The GoPro Hero 7 is a model prior to the Hero 8. It includes a built-in HDMI port for outputting camera signals. The method for connecting a GoPro Hero 7 is easy.
First, you only need a Micro HDMI cable. Then, connect one end to the GoPro’s HDMI port and the other end to the YoloBox. You will see on the GoPro’s display that it has entered Media Mode. Go into the preferences menu, select the input/output settings, and set the HDMI output to “Live.”

2) GoPro Hero 11
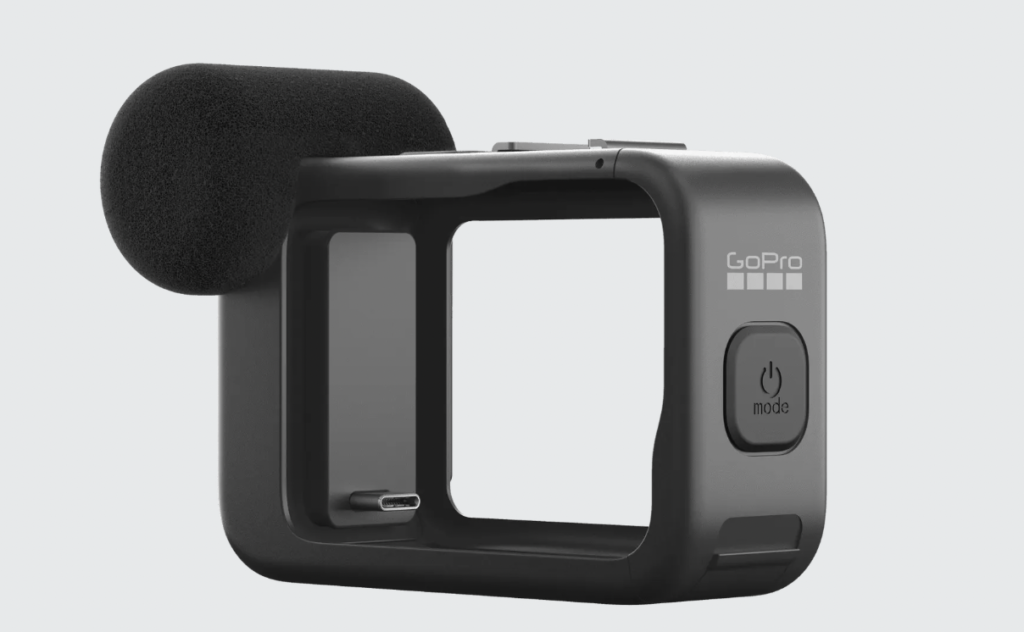
For the GoPro Hero 11, you’ll need the Media Mod, which includes a Micro HDMI port. Connecting is simple. First, insert the GoPro into the Media Mod, then use a Micro HDMI-to-HDMI cable to link the GoPro and the YoloBox. Make sure the GoPro is powered off during this process, as trying to connect while it’s on may result in a failed connection.

Once connected, power on the GoPro. It will enter media mode again. You need to go to the Preferences menu and look for the Input/Output option, then select Live. If you don’t see this option in Preferences, you can skip this step.
Finally, press the Mode button on the left side of the camera. Select the camera icon located at the top right of the screen, and continue pressing the Mode button until the eye icon is highlighted. This configuration will give you a clean HDMI output.
Wireless Connection
To connect your GoPro to YoloBox using RTMP, you’ll need to set up an RTMP server on your computer. Since GoPro doesn’t support direct RTMP transmission to YoloBox, the server acts as an intermediary.
Download an RTMP Server: You can find plenty of useful tutorials online.
Find Your Computer’s IP Address: Instead of using the RTMP URL directly from the server, find your computer’s IP address. Go to your Wi-Fi settings and check the connected network’s details.
Set Up the GoPro: In the GoPro app, tap the three dots next to Hero11 Black, select Live Stream, then RTMP. Connect to your Wi-Fi, ensuring all devices (GoPro, computer, and YoloBox) are on the same network. In the RTMP URL, replace the server’s IP address with your computer’s IP (e.g., rtmp://8.8.8.8/live/gopro). Make sure the path is unique.
Adjust Settings and Go Live: Set your desired resolution and choose whether to save a local copy of the stream. Tap “Set Up Live Stream,” then “Go Live.” If successful, you should see the stream in your RTMP server.
Connect to YoloBox Ultra: In YoloBox, go to the Video Source menu, select RTMP, and paste the same RTMP URL used in the GoPro app. Click “Done” to view the GoPro feed.
Conclusion
Using your GoPro with YoloBox can enhance your live streaming capabilities, whether you opt for a wired or wireless connection. By following the steps outlined above, you can quickly set up your GoPro for high-quality streaming. Keep in mind the potential issues and solutions to ensure a smooth experience. Happy streaming!
4,710 total views, 3 views today

Meredith, the Marketing Manager at YoloLiv. After getting her bachelor’s degree, she explores her whole passion for YoloBox and Pro. Also, she contributed blog posts on how to enhance live streaming experiences, how to get started with live streaming, and many more.


