What is Web URL Overlay
Whether you are a pro live streamer or just a beginner, the impact of the visual design for the live stream cannot be ignored by us. The graphic overlay is one of the most commonly used visual elements in the live stream to enhance the available content.
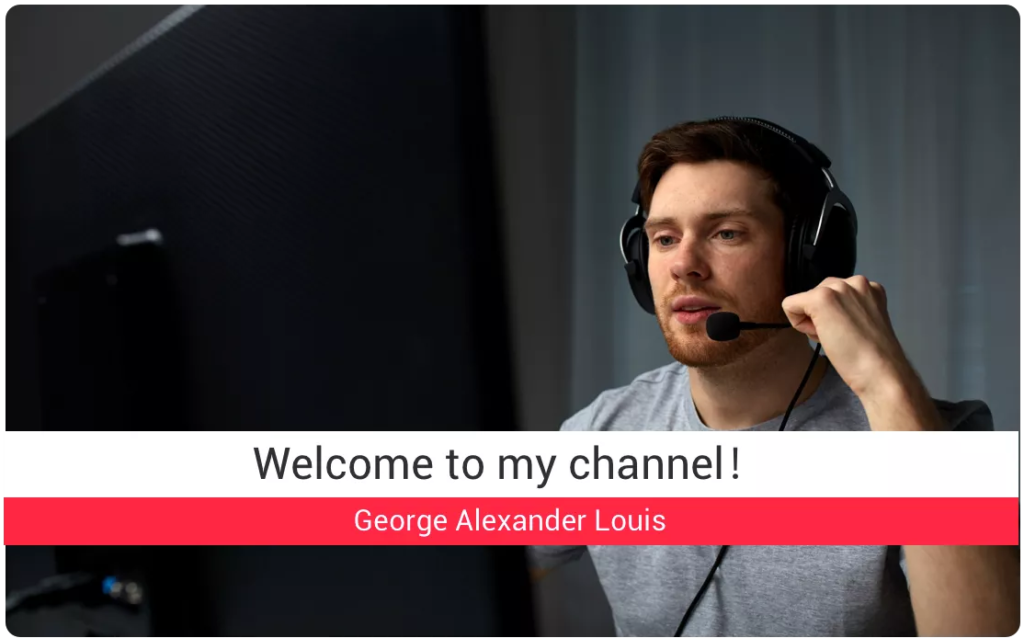
With the development of streaming, right now we have more tools to design our own graphic overlays. Web URL overlay is a new beloved type for broadcasters.
- It is convenient to use and edit in the process of live streaming
- Does not have high requirements for the computer hardware like for other software (PS or AE).
- The design would also be stored online, so that you can use it wherever you want.
- Websites would also provide some preset templates for the users who want to save time from the original designs.
Introducing YoloCast
YoloCast is a go-to live streaming platform that gives you more control than ever to deliver professional live videos and engage your audience. You can host, monetize and broadcast with a superior viewing experience. With three different plans available, you can choose it by comparing these plans with the various functions provided in each plan.
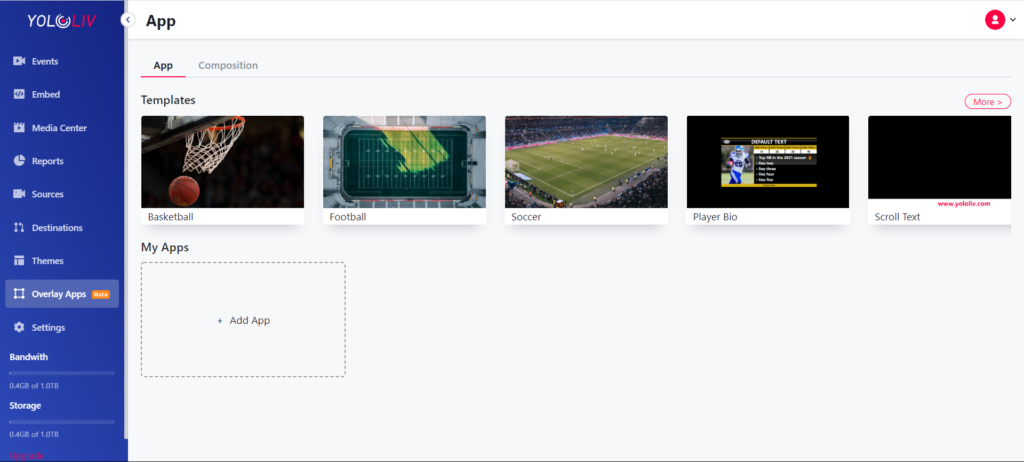
But for Web URL overlay, it is totally free via the Overlay App option. You can enter the Overlay Apps either in the free trial or after the free trial is ended. It is also planned to cooperate with the YoloBox serials in the future update. Here we would use the online graphic overlays in it as an example for the use.
How to Add Web URL Overlays on YoloCast?
For updated information please check: How to Use the Overlay Lab on YoloCast? (2025 Updated)
#1 Add App
To create your graphic overlay, you can either choose the available templates on the top or click the Add New Overlay button on My Overlays. Right now the Templates include Basketball, Football, Soccer, Plaver Bio, Scroll Text, Lower Part, Lower Standard, Badminton ScoreBoard, and CountDown. If you want to design your own graphic overlay or template, there is the Composition option for you to add it.
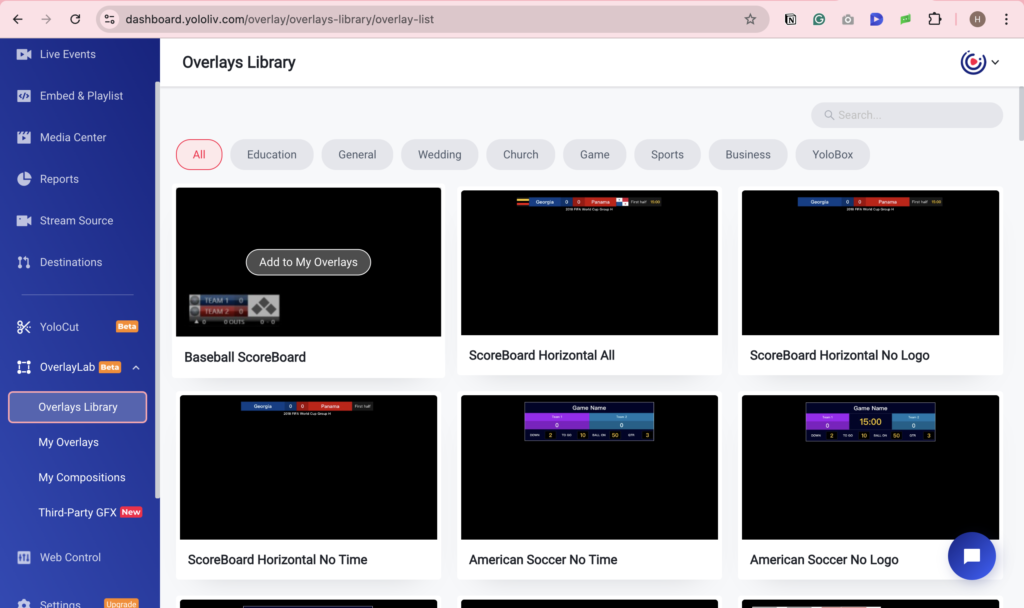
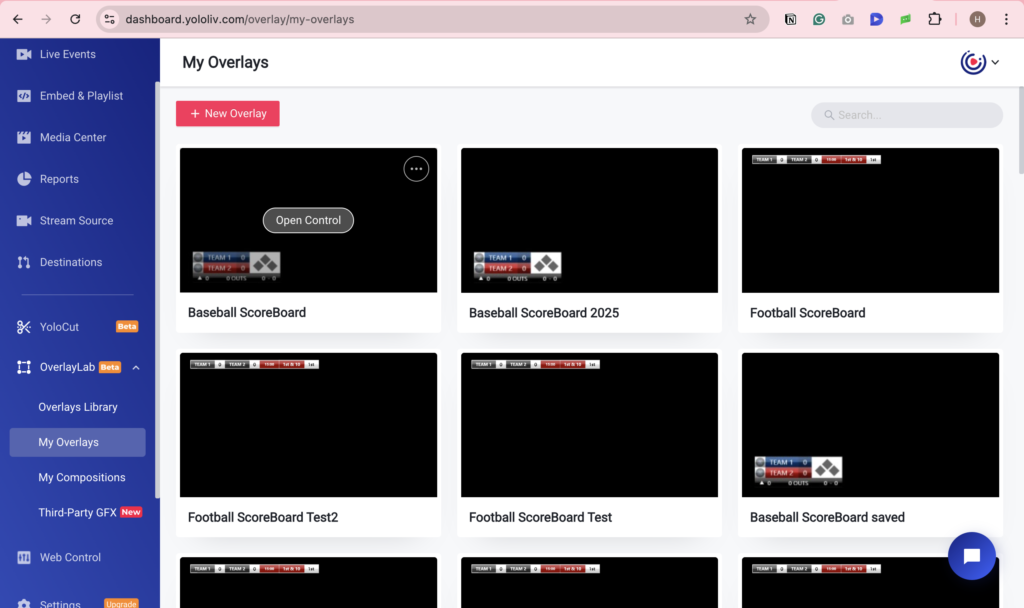
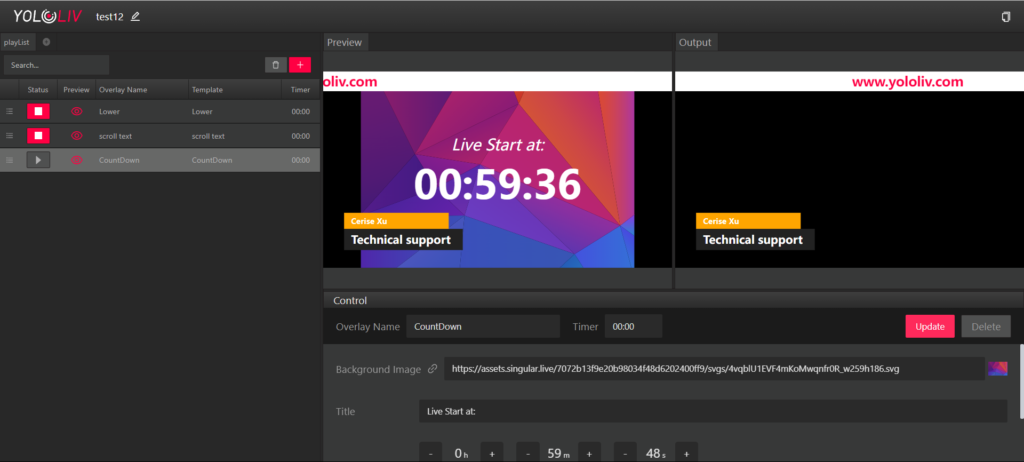
After choosing the options to add the App, you would enter the monitor of the Web URL which can be easily separated into 4 parts, playlist, control, preview, and output.
#2 Preview&Output Windows
As we can see on the monitor page, there are two separated windows to show the overlays you add to the screen. These windows do not have any featured option to modify the overlays, but to check what it looks like on the screen.
The preview window is the section in which you can check if the overlays are ready to be posted. If you change any settings for the overlay, it would show directly in the preview section, especially for the location of the overlay on the screen. Knowing what would it be like before you push it to the audience will avoid many mistakes and get you prepared.
The output window is the real-time display of your Web URL on the live stream. In this section, you can arrange the appearance and hide the overlays one by one following the script.
#3 Playlist Panel
The playlist is the list of overlays you use to control the display and its order on the list. You can have different playlists to group different types of overlays you can for better management.
Take your overlays on and off-air by clicking on the play and pause buttons for the output window. The eye icon next to it would only adjust the on and off-air in the preview window. Do take care of the option you use while adjusting the show-up in windows since the overlay could be posted before the editing.

#4 Control Panel
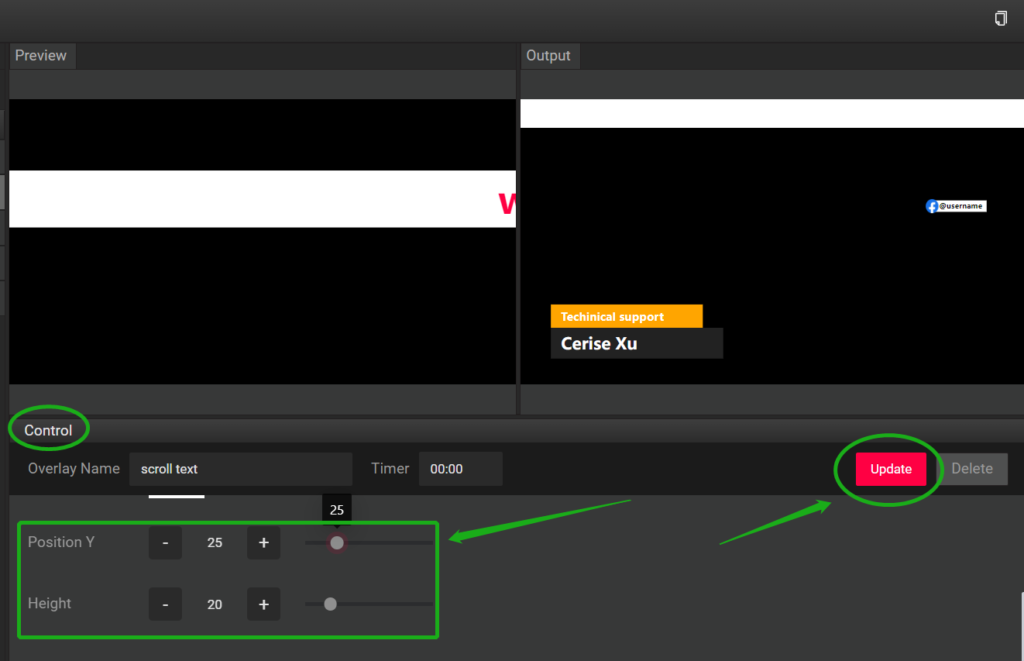
Control is for the details of the graphic overlays you want to adjust. For example, you can change the name, the time of resisting, height number, and position Y for the scrolling text. Different types of overlays you add would have different settings. And the modified result is in the preview for you to confirm. When it’s ready, you can click the update to save the edition.
Note: Make sure to frequently use the red “Update” button if you are not seeing any changes to your overlay contents that you update on-air.
#5 Add Web URL Overlay to Your Stream
After all the setup is ready, you can click the “Copy Output Url” on the top right of the page to get the web link. For YoloBox, if the link is too long to be typed in, you can use Bitly to shorten and enter it as the Web URL Overlay.

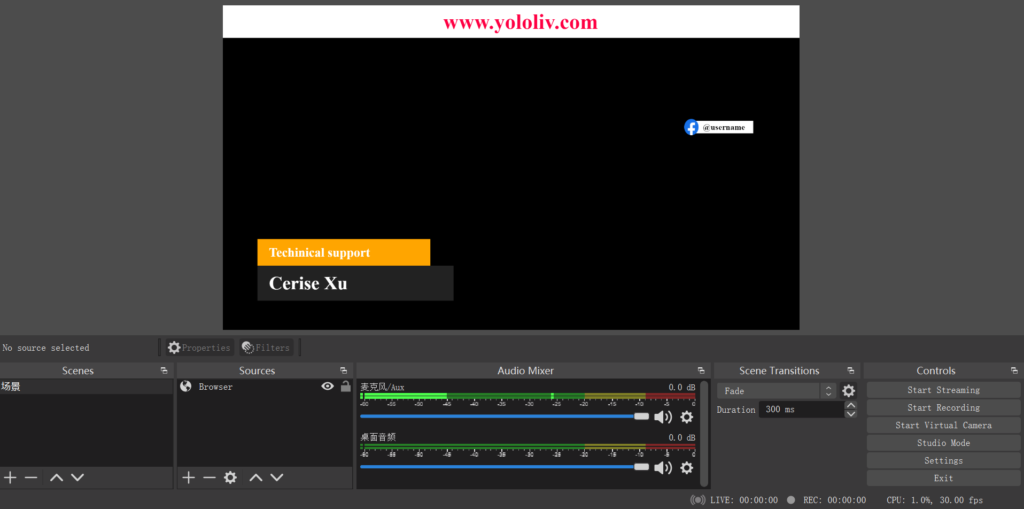
In OBS, you need to create a brand new overlay layer by selecting the “+” button in the Scenes panel and selecting “browser”. Then paste in your output URL and adjust the resolution settings. We recommend typing in 1920 for the width and 1080 for the height to have a better view.
Future Consideration
It can be somehow overwhelming to understand all these tools and how they work in the YoloCast. But exploring them is simple and would bring you more sense of achievement. With the YoloCast, you can step forward by adding necessary information for the host and benefit from the live stream with an easy setup.
To know about how to use the YoloCast, check the Beginner’s Guide here.
Interested in learning more about our new streaming solution YoloCast? Why not take advantage of our 14-day free trial to test out all our great features for yourself? Click the button below to get started today. No credit card is required.
Finally, for exclusive offers and regular tips on live streaming, you can also join our Facebook Group.
Cerise is a support specialist at YoloLiv with three years of experience working as a Customer Support Specialist in the consumer electronics industry. She also produces articles including video productions, tips and tricks and expert knowledge in the audiovisual industry.


