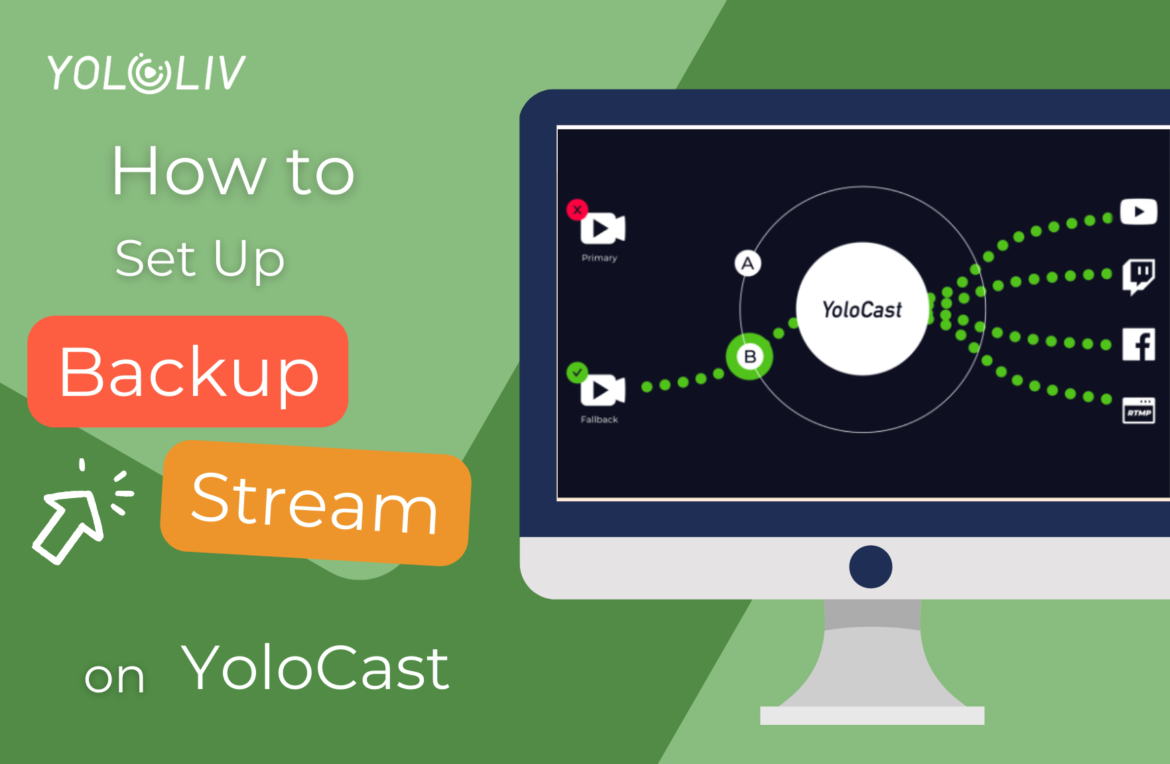
In the dynamic world of live streaming, having a backup plan is not just an option—it’s a necessity. With YoloCast, setting up a backup stream ensures that your broadcast remains uninterrupted, even in the face of unforeseen challenges. This article will guide you through the process of configuring your main and backup streams on YoloCast taking OBS as an example, ensuring that your live events go off without a hitch.
What you need
In order to use this feature, you will need to set up two separate encoders, the first should stream to Primary, and the other should stream to Backup. Here, we’ll take OBS as the encoder to make an example.
Creating an Event on YoloCast
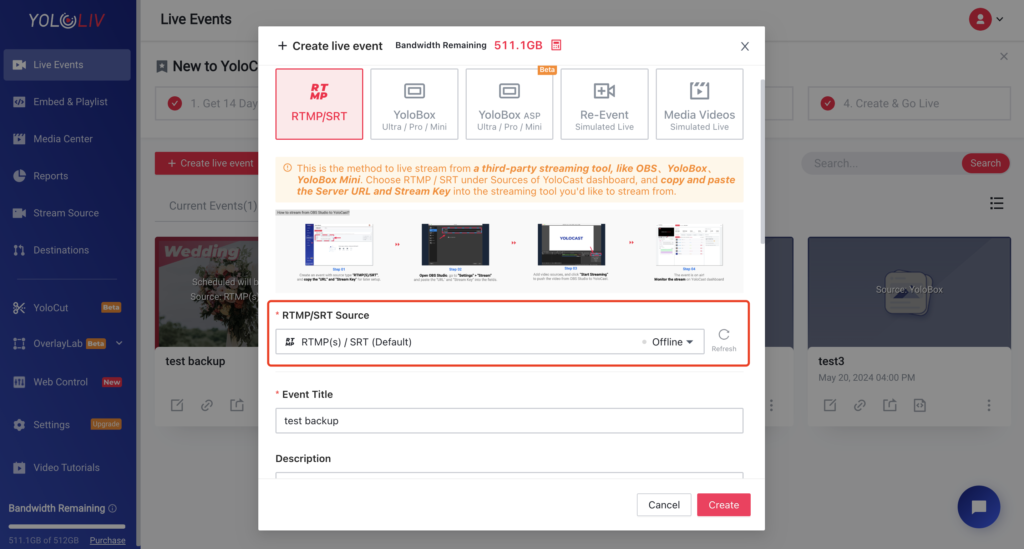
First, create an event on YoloCast by selecting RTMP/SRT (default) as the video source, and input the Event Title, Thumbnail, Destinations, Start Date/Time, and other relevant information to complete the event setup.
Get RTMP/SRT
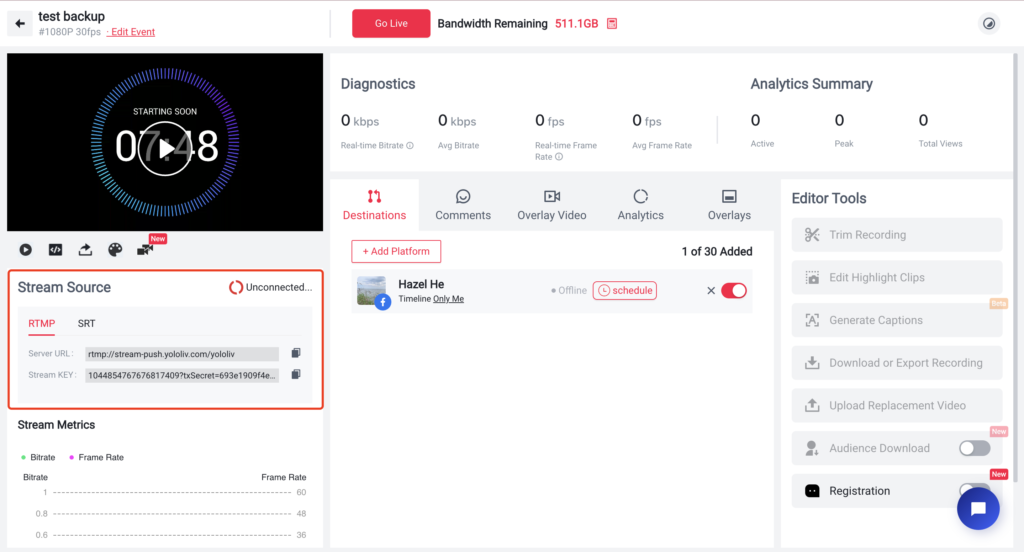
Before moving to the next step, it’s essential to obtain the RTMP/SRT URL and Stream Key from the event panel on YoloCast. Fortunately, YoloCast offers the same RTMP/SRT URL and Stream Key for both the main stream and the backup stream. Here’s how to get them:
- For the Main Stream: enter the live evnt you’ve set up. Just below the video preview, you will locate the RTMP URL meant for the main stream. This URL is what you need to enter into your streaming software (like OBS) to send your live feed to your audience through YoloCast.
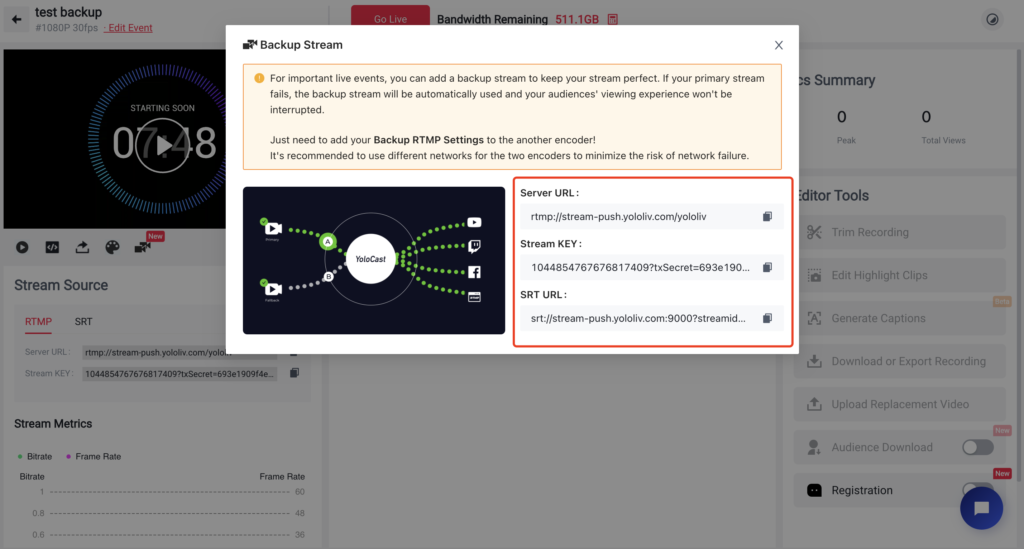
- For the Backup Stream: In the same live room, find and click the backup stream icon, which is also located below the video preview. Clicking this icon will reveal the backup stream’s URL and Stream Key.
Setting Up Your Backup Stream in OBS
Now, let’s configure your streams in OBS:
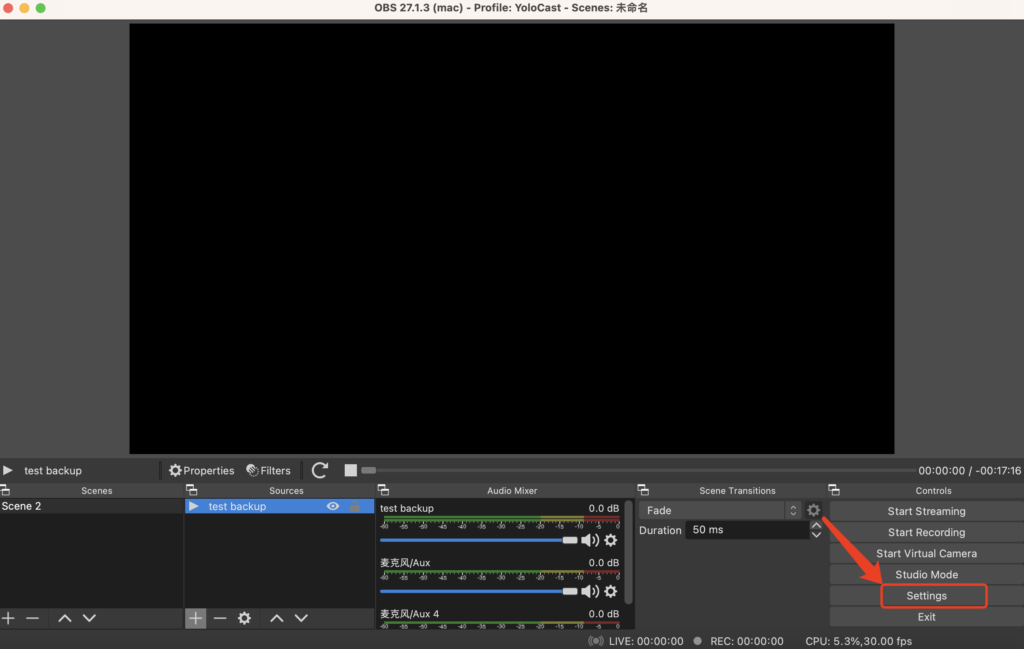
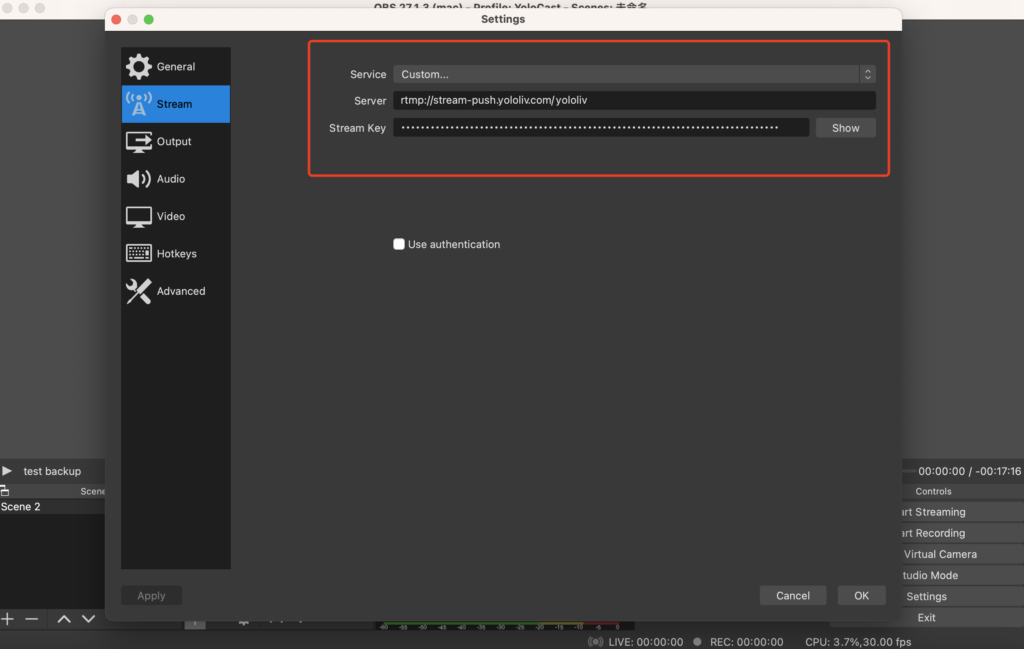
- Open OBS and access the ‘Settings’ menu, followed by navigating to the ‘Stream’ tab.
- Select ‘Custom’ as your service and input the primary stream’s URL and key for your initial OBS setup.
- Repeat the process in another OBS, this time inputting the backup stream’s details. This step ensures you have both your main and backup streams ready to deploy.
Going Live
With the preparations out of the way, it’s time to launch your stream:
- First, go to the event page on YoloCast and click “Go Live.” Then, return to OBS and start streaming the main stream.
- Once the main stream is transmitting, you’re at liberty to start streaming the backup.
- If the main stream disconnects, the backup stream will automatically take over. You can test this by stopping the stream in OBS to disconnect the main stream and see if the backup stream takes over automatically.
- If your main stream recovers, ensure that it is alive. At this point, you need to stop the backup stream to switch back to the main stream, as the system will not automatically switch back to the main stream.
Conclusion
In live streaming, the unexpected is part of the terrain. By setting up a backup stream on YoloCast, you mitigate risks and ensure your audience enjoys a constant, uninterrupted experience. Transitioning between your primary and backup streams, when necessary, becomes a skill that enhances your broadcast’s professionalism and reliability.
This comprehensive guide to establishing a backup stream with YoloCast and OBS fortifies your streaming strategy, preparing you for any hiccups along the way. Remember, in the realm of live broadcast, preparedness for potential disruptions not only brings peace of mind but also elevates your streaming endeavor to new heights of success.
5,721 total views, 3 views today

Hailey, a Customer Success Specialist at Yololiv, she brings immense enthusiasm to assisting users in understanding the various features of YoloCast and resolving any usage-related issues they may encounter. Alongside her support efforts, she also curates articles sharing tips, troubleshooting advice, and other helpful insights to enhance users’ experience with YoloCast.

