What is the UVC(USB-C Webcam Out)
UVC, or USB-C webcam out is a specification that enables webcams, digital camcorders, and other video devices to communicate with a host computer without the need for additional drivers or software. For YoloBox customers, it’s a functionality that allows your YoloBox to be recognized as a webcam directly by a laptop and used for meetings on Zoom, Skype, Microsoft Team, and more.
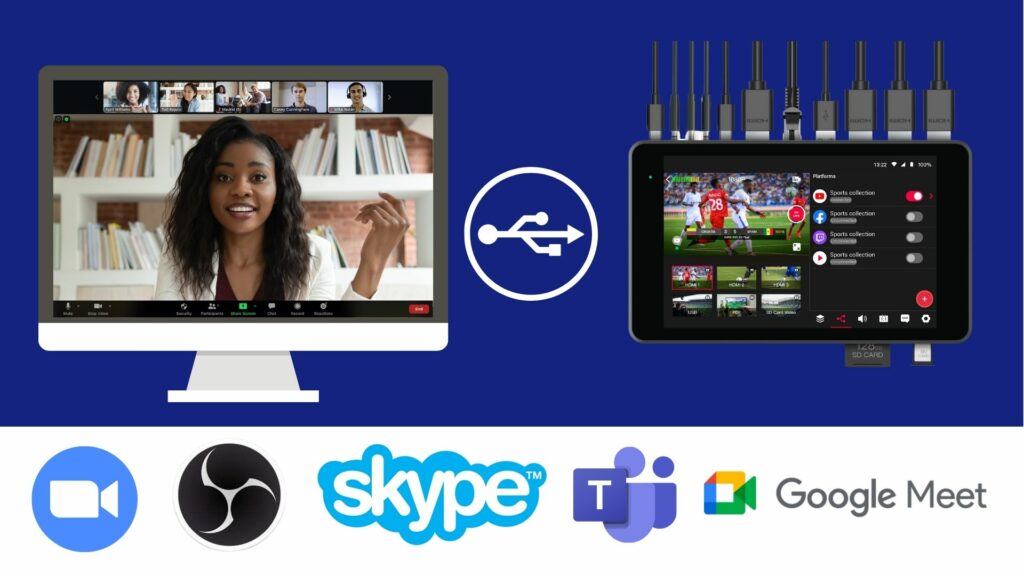
UVC is supported by most operating systems, including Windows, macOS, and Linux, making it a universal standard for video devices. It simplifies the setup and configuration of video devices, allowing for easy plug-and-play use.
Why We Need UVC on YoloBox Pro
When using YoloBox Pro with UVC to connect with a computer, it means that you can simply connect the YoloBox Pro to your computer using a USB cable and it will automatically be recognized as a video input device. This eliminates the need for a capture card, which is a device used to capture and digitize video signals from external sources like cameras or video game consoles.
In summary, using YoloBox Pro with UVC to connect with the computer eliminates the need for a capture card, which simplifies the setup process and can also be more cost-effective.
Steps to Connect YoloBox Pro as Webcam
Step 1
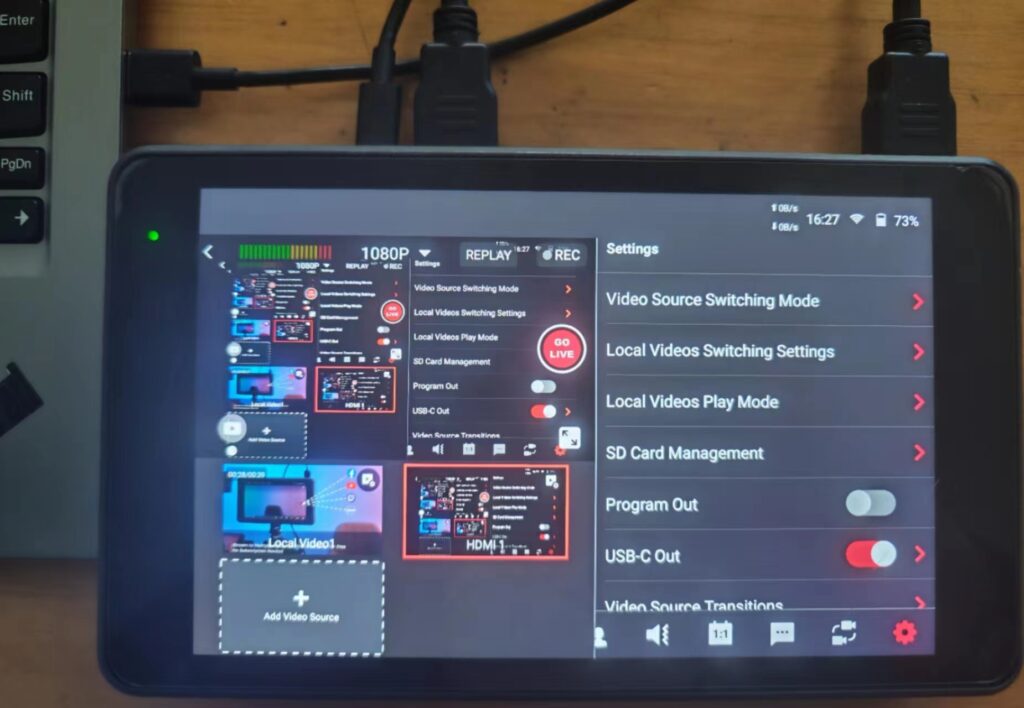
Turn on the USB-C out option: For YoloBox Pro/Mini, please find the option in the Setting and then turn it on, it is off by default.
Step 2
Connect the YoloBox Pro to your computer: The YoloBox Pro will need to be connected to your computer using a USB-to-USB data transfer cable (please make sure the cable supports the function of reading and transferring, not just for charging). Insert one end of the cable into the USB-C port and the other end into your computer’s USB input.
Note: YoloBox Mini also has the UVC function, but the port to connect is different. Please use the USB-A port to connect to the computer and make sure the cable is also for data-transferring.
Step 3
Open your preferred video software to set up, especially the video conferencing software we’re talking about here. In the next step, we will walk you through how to set up each of those video software including OBS, Skype, Zoom, Google Meet and Microsoft Teams.
Step 4
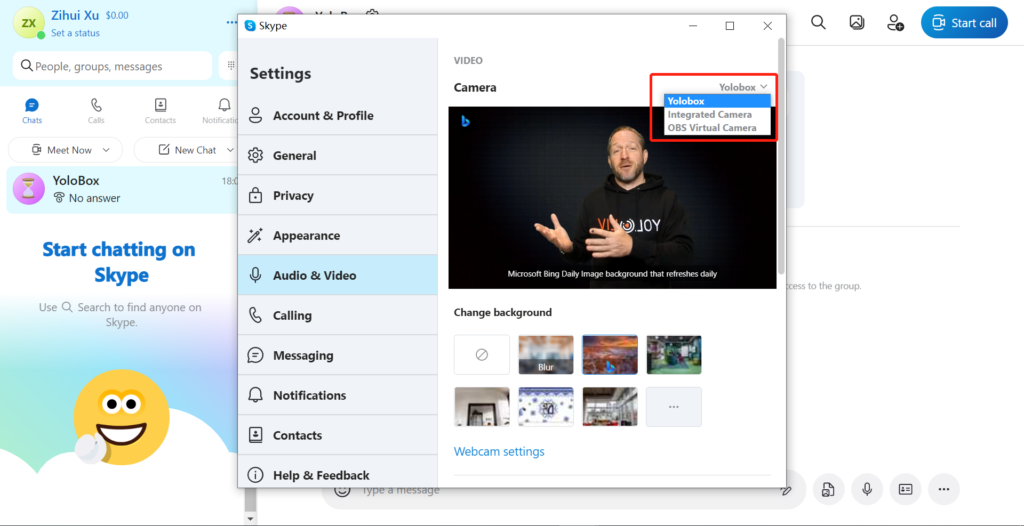
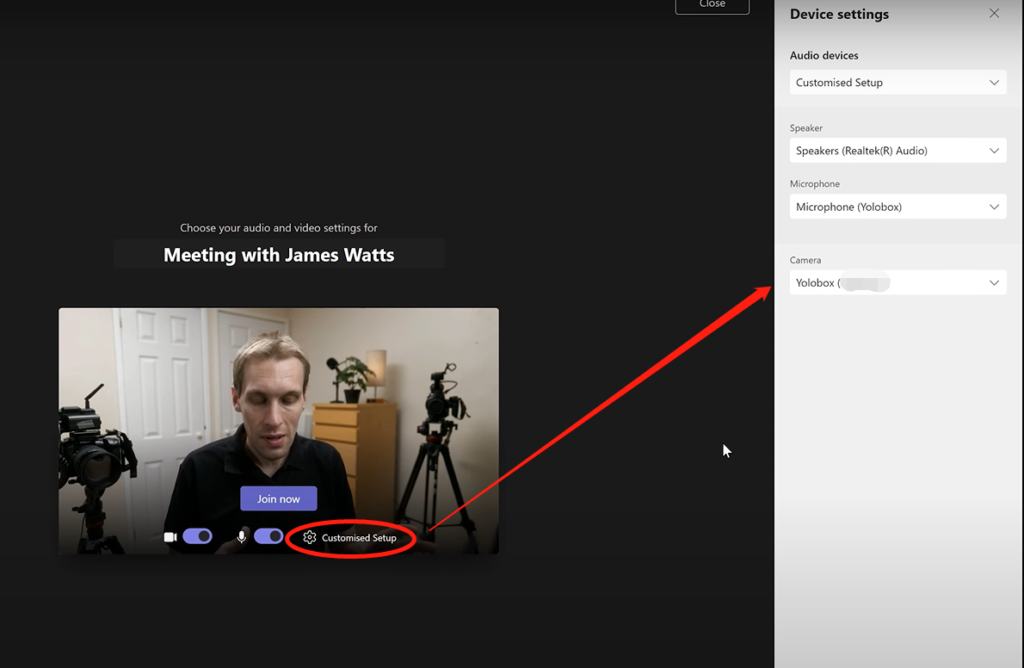
Select the YoloBox Pro as the video input: In the video software, go to the settings or preferences menu and select YoloBox as the video input. You should be able to see the output on your computer screen. (Pictures from James Watt’s video tutorial)
1) Set up OBS as Destination
Please make sure you have done the below steps when using USB out with OBS:
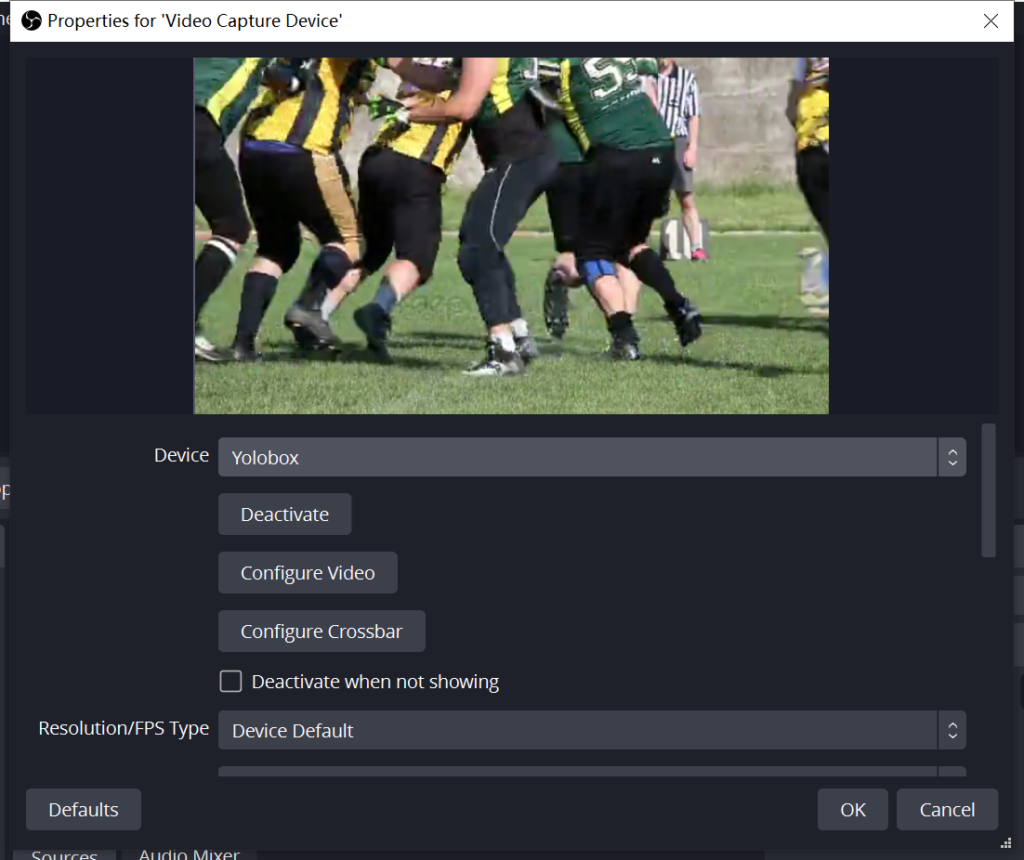
- Add a Video Capture Device and choose YoloBox on the list.
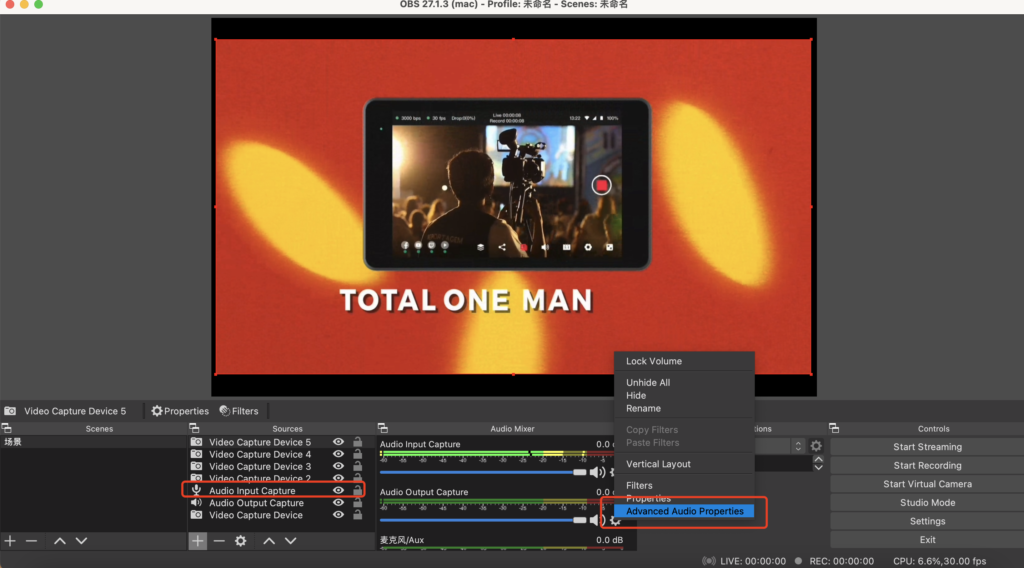
- Add an Audio Capture Device and choose the USB audio from YoloBox.
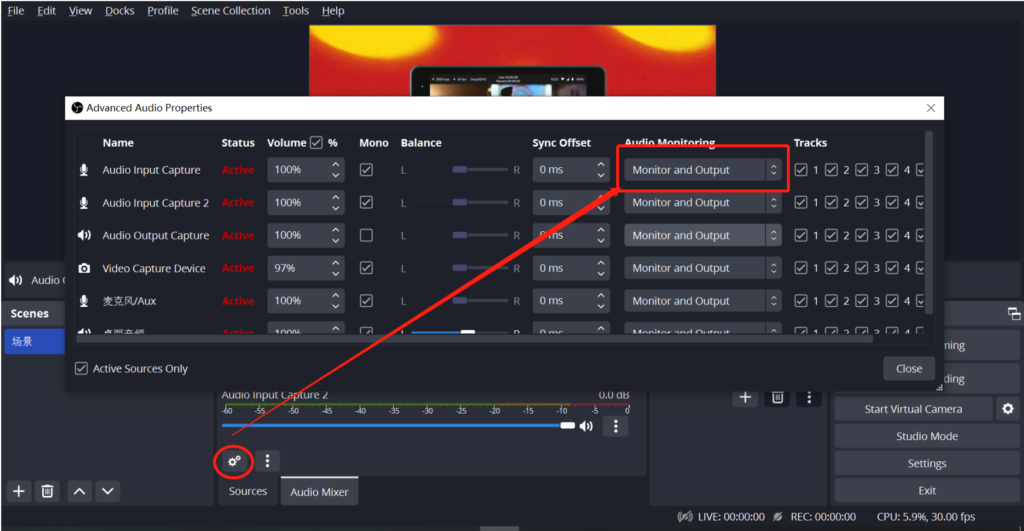
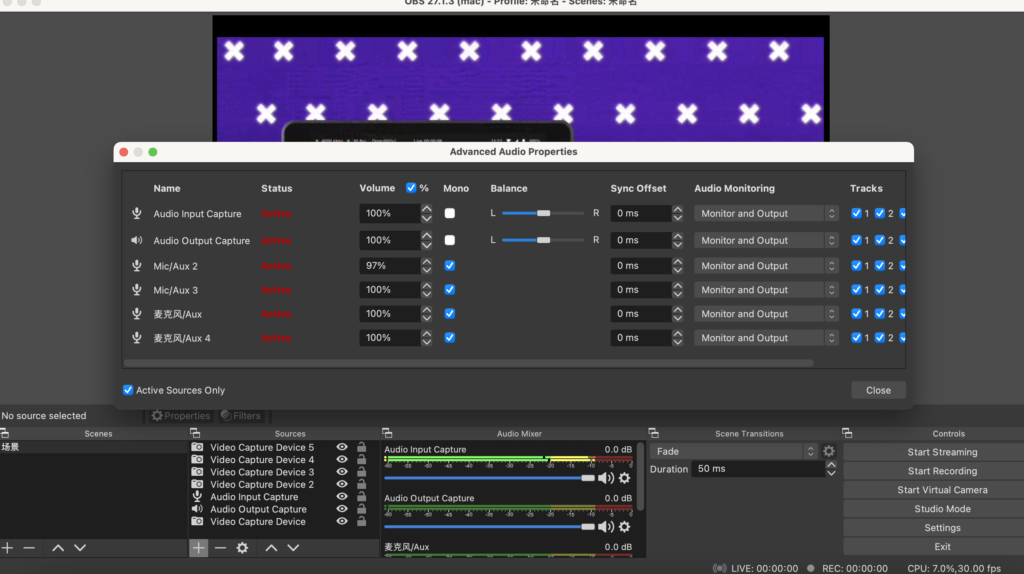
- Go to the Audio Mixer in OBS and choose the settings gear on the bottom, then you would see the options for Advanced Audio Properties. Change the Audio Capture’s Monitoring into Monitor and Output.
- Go to the Setting of the OBS and check Audio-Advanced to make sure the Monitoring device is the one you use for checking the audio.
2) Set up Skype as Destination
- Click on your profile picture or initials in the top left corner of the screen.
- Select “Settings” from the drop-down menu.
- In the Settings menu, select “Audio & Video” from the left-hand side menu.
- Here you can select your preferred camera, microphone, and speaker from the drop-down menus.
- You can also adjust the volume and test your audio and video settings using the buttons provided.
- Once you have made your desired changes, click on the “Save” button to apply the settings.
3) Set up Zoom as Destination
- Click on your profile picture or initials in the top right corner of the screen.
- Select “Settings” from the drop-down menu.
- In the Settings menu, select “Audio” or “Video” from the left-hand side menu.
- Here you can select your preferred camera, microphone, and speaker from the drop-down menus.
- You can also adjust the volume and test your audio and video settings using the buttons provided.
- Once you have made your desired changes, click on the “Save” button to apply the settings.
One of our customers Noel also makes a video about how to USE your Your YoloBox Pro with ZOOM as a webcam via USB-C or via HDMI Out. Check it out!
4) Set up Google Meet as Destination
- Join a Google Meet session.
- Once you are in the meeting, click on the three-dot menu icon in the bottom right corner of the screen.
- From the menu that appears, select “Settings.”
- In the Settings menu, select “Audio” or “Video” from the left-hand side menu.
- Here you can select your preferred camera, microphone, and speaker from the drop-down menus.
- You can also adjust the volume and test your audio and video settings using the buttons provided.
- Once you have made your desired changes, click on the “Save” button to apply the settings.

5)Microsoft Teams
- Launch Microsoft Teams and sign in to your account.
- Click on your profile picture in the top right corner of the screen.
- Select “Settings” from the drop-down menu.
- In the Settings menu, select “Devices” from the left-hand side menu.
- Here you can select YoloBox as your preferred camera and microphone from the drop-down menus.
- You can also adjust the volume and test your audio and video settings using the buttons provided.
- Once you have made your desired changes, click on the “Save” button to apply the settings.
To know more about the UVC function, check the tutorial with a detailed introduction about how UVC benefits the use with YoloBox Pro/YoloBox Mini.
Wrap Up
YoloBox Pro USB Webcam Out or UVC gives customers an easy way to use YoloBox Pro as a webcam and stream to their favorite video conferencing software. That makes YoloBox Pro really all-in-one for encoding, recording, monitoring, multistreaming, switching, and video conferencing.
If you‘re new to YoloLiv, please join the Official YoloLiv group on Facebook, where you can get access to valuable resources, support, and updates on the latest features and functionalities of YoloBox Pro. You can also connect with like-minded individuals who share your passion for live streaming and get insights and tips on how to improve your streaming skills.
So, don’t wait any longer, try out the YoloBox Pro and join the official Yololiv group on Facebook to take your live-streaming to the next level!
Cerise is a support specialist at YoloLiv with three years of experience working as a Customer Support Specialist in the consumer electronics industry. She also produces articles including video productions, tips and tricks and expert knowledge in the audiovisual industry.

